Sunday, January 20, 2013

Recipes 41 & 42: Plum glazed Duck Breast and A Quinoa Salad

Over the thanksgiving break I had a duck breast at a restaurant in Eugene.  I thought it was really good, though perhaps a little rawer than I would have made.  However, that made me really want to try out making duck.  I was debating between two recipes, one with peaches and one with plum.  Since peaches aren't really in season I decided to go with the plum glazed recipe.

In addition, I also decided to make a quinoa salad to go with it.  I must admit that when I first tried quinoa I was a little skeptical, but I have really enjoyed a lot of the recipes that I have made with it.  I think that one big difference is making it with broth instead of water.  I think that adds a lot to the flavor.

Just a note, you might have noticed that this is recipe 42, and it happened in late November.  Which basically means that to reach my goal of 52 in a year I would have to make 10 recipes in the month of December.  It was a daunting challenge, and I wasn't sure if I was going to be able to make it, despite being behind on blogging, I swear that I did!

Here is the final result, primarily of the duck, but you can see the salad in the background.


Here is the recipe that I used for the duck: (Link)

Ingredients

  • 2 boneless, skin-on duck breast halves (about 1 lb. each)  
  • Kosher salt and freshly ground black pepper  
  • 1/2 cup plum preserves    
  • 1 Tbs. reduced-sodium soy sauce   
  • 1/4 tsp. Chinese five-spice powder  
  • Pinch crushed red pepper flakes    
  • 3 scallions, thinly sliced 

Directions

Position a rack in the center of the oven and heat the oven to 425°F. Trim any excess skin and fat from the duck and score the remaining skin and fat underneath in a 1-inch diamond pattern, taking care not to cut the flesh. Pat the duck dry and season generously with salt and pepper.
Heat a 12-inch heavy-duty skillet over medium-high heat. Put the duck in the skillet skin side down, reduce the heat to medium low, and render the fat until only a thin, crisp layer of skin remains, about 8 minutes.

Meanwhile, in a small bowl, combine the preserves, soy sauce, five-spice powder, and red pepper flakes.

Turn the duck over, carefully spoon off most of the fat from the skillet, and brush the preserves mixture over the breasts.

Transfer the skillet to the oven and roast until an instant-read thermometer inserted into the thickest part of a breast registers 135°F for medium rare, 8 to 10 minutes. Transfer the duck to a cutting board and let rest for 5 minutes. Meanwhile, tilt the skillet and spoon off as much fat from the pan juice as possible. Slice the duck diagonally into 1/4-inch slices. Arrange on plates and spoon the pan juice over. Sprinkle with the scallions and serve.

Changes

 The only change that I made was in the duck breasts that I used.  This recipe called for 2 large breasts, but the only store where I could find duck only had a frozen package of two 1/2 pound duck breasts.  This meant that they were smaller than the recipe called for.  This changed the cooking time for the recipe as I cooked it a little bit less than the recipe called for.


And here is the recipe that I used for the Quinoa Salad: (Link)

Ingredients

  • 1-1/2 cups quinoa, preferably red  
  • Sea salt  
  • 5 Tbs. extra-virgin olive oil; more as needed  
  • 1 large red onion, quartered lengthwise and thinly sliced crosswise  
  • 2 Tbs. balsamic vinegar  
  • 4 oz. arugula, trimmed and thinly sliced (about 3 cups)  
  • 4 oz. aged Gouda, finely diced (about 1 cup)  
  • 3 medium celery stalks, thinly sliced  
  • 1 large, crisp apple, such as Fuji or Pink Lady, cut into 1/2-inch dice  
  • 1 cup walnuts, coarsely chopped  
  • 1 cup finely diced fennel  
  • 3/4 cup dried cranberries  
  • 3 Tbs. sherry vinegar  
  • Freshly ground black pepper

Directions

In a bowl, rinse the quinoa with water, rubbing it between your fingers for about 10 seconds. Drain and transfer it to a 3-quart pot. Add 2-1/2 cups water and 1/2 tsp. sea salt and bring to a boil over medium-high heat. Reduce the heat to medium low and simmer, covered, until the quinoa is tender but still delicately crunchy, about 15 minutes.

Drain the quinoa and return it to the pot. Cover and let the quinoa rest for 5 minutes; then fluff it with a fork. Let cool to room temperature.

While the quinoa cooks, heat 2 Tbs. of the olive oil in a 12-inch nonstick skillet over medium-high heat. Add the onion and a pinch of salt; cook, stirring frequently, until tender and brown around the edges, 6 to 8 minutes. Add the balsamic vinegar and toss with the onions until the vinegar cooks away, about 1 minute. Remove from the heat and let cool to room temperature.

In a large bowl, mix the quinoa, onions, arugula, cheese, celery, apple, walnuts, fennel, and cranberries.

In a small bowl, whisk the remaining 3 Tbs. olive oil with the sherry vinegar, 1/2 tsp. sea salt, and a few grinds of pepper. Add the dressing to the salad and gently mix it in. Let rest a moment; then season to taste with salt and pepper. Add more olive oil if the salad seems dry.

Changes

I made two minor changes to this.  The first is that I used chicken broth to cook the quinoa in.  Also, it should be noted that I didn't wash the quinoa since I buy the prewashed brand.  However, if you don't buy prewashed quinoa, you need to make sure to wash it, otherwise it isn't going to taste very good.

The second change was that I did not add 4 oz of arugula, that seemed like way too much.  I might have added 2.5 or 3.  But I would recommend adding as much as you want.

The Process

The first step in cooking the duck was to trim the fat and score the skin.  Here I have laid them out.  To trim it I just cut a little bit of the skin off, since there wasn't a lot of fat.  Scoring the skin was a little tough, mainly because I wasn't exactly sure what I should do.  So I basically just cut the skin in diamond patterns and tried to make it a little deep, but not deep enough to reach the skin.


Once that was done I put the breasts in the skillet, skin side down.


After a few minutes, I flipped them over, the skin was crispy, so they were pretty much done.
I spooned over the plum preserve and then put them into the oven to cook them.


Meanwhile, probably actually before most of the duck work, I worked on the salad. Here is the Gouda and onions chopped up.

Most of the steps of this is pretty simple.  I cooked up the onions and quinoa and then mixed it all together.  You can see in the picture below that this looks like a lot of arugula, and that isn't even all that the recipe called for.

Here is is mixed up a little bit more.

Again, the cook time for my duck was a little bit shorter, but I took it out based on the thermometer.  I actually cooked it a little high. I think I probably went to 150 instead of 135.

And here is the final result.


I thought that both of these recipes were terrific.  The salad was really good, especially with the guoda and cranberries.  The duck was also very good.  I wish that I could have got not frozen breasts, but that was ok, this was still a great recipe.

Saturday, January 19, 2013

Recipes 39 & 40: Blue Ribbon Chili and Creamy Broccoli Casserole

While most of the recipes I have made have been completely new, there was one point where I was really feeling like Chili.  I have a recipe that I typically used, but I figured that it would be fine to highlight that.

In addition, I figured that I would make something to go with it, so that at least I was making something new.  So I settled on a broccoli casserole.

Here is a picture of the chili:


And of the broccoli casserole:


I have made this Chili many times and it is really great.   Here is the recipe (link)

Ingredients

  • 2 pounds ground beef
  • 1/2 onion, chopped
  • 1 teaspoon ground black pepper
  • 1/2 teaspoon garlic salt
  • 2 1/2 cups tomato sauce
  • 1 (8 ounce) jar salsa
  • 4 tablespoons chili seasoning mix
  • 1 (15 ounce) can light red kidney beans
  • 1 (15 ounce) can dark red kidney beans

Directions

  1. In a large saucepan over medium heat, combine the ground beef and the onion and saute for 10 minutes, or until meat is browned and onion is tender. Drain grease, if desired.
  2. Add the ground black pepper, garlic salt, tomato sauce, salsa, chili seasoning mix and kidney beans. Mix well, reduce heat to low and simmer for at least an hour.

Changes

 The only change that I made to this recipe was that I used ground sirloin.  I didn't have two pounds, I only had 1.3, but I kept everything else the same.

And here is the recipe for the broccoli casserole. (link)

Ingredients


  • 1 (16 ounce) package frozen broccoli, thawed
  • 2 tablespoons butter
  • 1/4 teaspoon salt
  • 2 tablespoons all-purpose flour
  • 2 cups milk
  • 1 (8 ounce) package cream cheese, cubed
  • 1 cup crushed buttery round crackers

Directions

  1. Preheat oven to 350 degrees F (175 degrees C).
  2. Place broccoli in a steamer over 1 inch of boiling water, and cover. Cook until tender but still firm, about 4 to 6 minutes; drain.
  3. Melt butter in a large saucepan over medium heat. Stir in salt, flour, and milk. Cook, stirring constantly, until thick and bubbly. Stir in cream cheese until melted. Remove from heat, and stir in broccoli.
  4. Sprinkle 1/2 cup of crushed crackers over the bottom of a 1 1/2 quart casserole dish. Slowly pour the broccoli mixture into the dish, and top with remaining crushed crackers.
  5. Bake in preheated oven for 30 minutes.

Changes

The main change that I made to this was that I used fresh broccoli and steamed it before continuing with the recipe.  In addition I cut the cream cheese in half and also added some garlic salt and pepper to the sauce since a lot of reviewers talked about it being a bit bland.

Finally, I only added the crumbled crackers to the top of the dish.

The Process


I started by cooking the ground sirloin and onions in a large pot.


Sprinkles, attracted by the smell of the meat came to investigate.

After the meat was ready I added the beans and spices and other ingredients, covered it and let it cook for an hour.

Then I started on the broccoli casserole.  I steamed the broccoli and then prepared the sauce.

Once the sauce was ready, I then mixed the broccoli into it.


I then put all of that into a pie plate.

I then added the crumbled crackers (in this case Ritz) to the top of the broccoli mixture.  I then put it in the oven.

As that was cooking, the chili finished.  I took it off the burner and let it sit until the broccoli casserole was done.

Here is a picture of the casserole just out of the oven.

Here is the final result of the chili, covered with sour cream and shredded cheddar cheese.

And here is the final view of the broccoli casserole.

The chili was as good as ever, I think I liked it better with ground sirloin instead of the ground beef.  I also liked the broccoli casserole.  I am not sure that it is a really healthy way to get broccoli, but it was good.

Overall, this was a very good meal.

Friday, January 4, 2013

Recipe 38: Grilled Sausages with Caramelized Onions and Apples

After a very successful friend Thanksgiving, I had a short week before thanksgiving, but I still needed to feed myself.  So I chose to make a dish that I have had on my list a very long time but never attempted.

This dish was very German kind of, with sausages and apples and onions, or at least it reminded me a bit of Oktoberfest and also of Fall.

Here is a picture of the final result:


And here is the recipe that I used: (Link)

Ingredients

  • 8 sausages
  • 2 tablespoons butter
  • 2 medium onions, halved and sliced
  • 3 large apples - peeled, cored, and cut into thin wedges
  • 2 tablespoons apple cider or red wine vinegar
  • 2 tablespoons brown sugar, packed
  • salt and pepper to taste

Directions

  1. Prepare grill for high heat.
  2. With a fork, poke sausages several times. Place in a pot, cover with water, and simmer over medium-high heat until cooked through, about 7 minutes. Remove from heat, and set aside.
  3. Warm butter in a skillet over medium heat. Stir in onions, and cook until soft and translucent. Stir in apples, vinegar, and brown sugar; cook, stirring gently, until caramelized, about 10 to 15 minutes. Season with salt and pepper.
  4. Meanwhile, place sausages on grill (or under broiler), and cook until well browned. Serve on a mound of caramelized apples and onions.

Changes

I made several changes to this recipe:

The first is that instead of cooking the sausage in water I instead used two bottles of beer.  I am not sure how much of an effect this had, but I really enjoyed it.

The second change was that I also made mashed potatoes to go with this dish.  I used this recipe (Link), which was pretty simple and used red potatoes which I like.  One thing to note about that recipe is that it is for 100 servings.  I obviously did not make that much.  I believe I made 2 servings and it was fine with this dish. 

The final change is that I did not have a grill around to cook the sausage on.  Instead I used the broiler for just a few minutes.

The Process

  I started by first preparing the potatoes.  I added them to a pot of water.


At this point, Sprinks walked in and stared at me.  

At the same time I started preparing the sausages.  Here you can see one sausage lifted out of the beer.  I almost forgot this when I was making it, but don't forget to poke holes in the sausage it makes a large difference it the flavors they soak up.

While both of those were cooking I prepared the apples and the onions.  Here you can see the carnage of coring and slicing apples. I am not the neatest corer in the world, but it got the job done.

By this time the sausages were done, so I set them aside and  begin working on the onions and apple mix.

I then prepared a cookie sheet with aluminum foil and place the sausages on it, to prepare for the broiler.

 With the onions and apples cooking, I begin to mash the potatoes, here you can see the butter, garlic and romano cheese added.

Soon the onions and apples were ready.  I didn't add a whole lot of salt and pepper to this, but you certainly could if desired.

I then finished mashing the potatoes.
Finally, I placed the sausages in the broiler.  I only broiled them for about a minute or 2 on each side, you definitely don't want to leave them in too long.

You can't really see this in the picture below, but I put the mashed potatoes down first, then on top of that I put the onions and apples and finally topped it off with the sausage.

I really liked this dish.  I know that I basically say that about everything that I make.... so I guess I am not sure how much that means.  But I thought this was great.  Definitely not very green or veggie oriented, so it wouldn't hurt to add a side salad to this dish.  But in terms of quantity of food this was more than enough for me.

Thursday, January 3, 2013

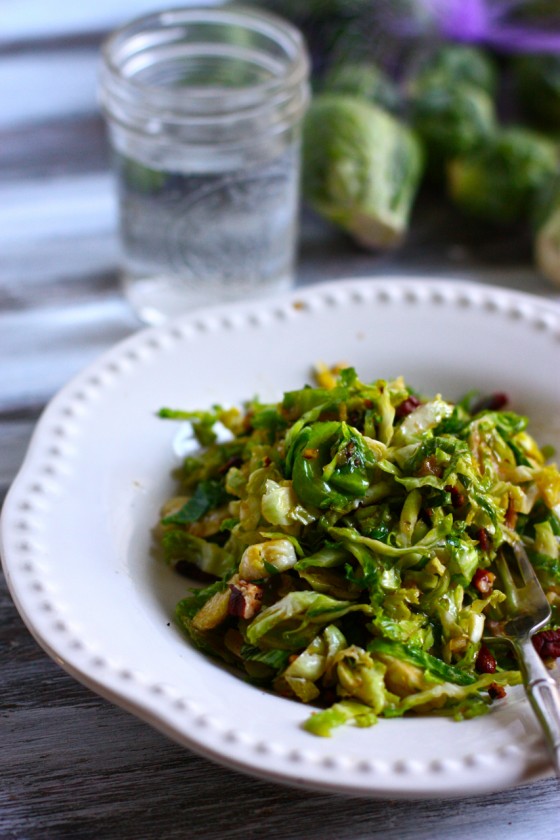
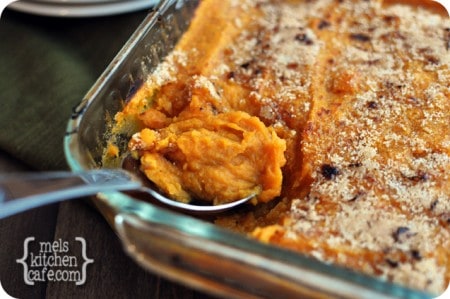
Recipes 36 & 37: Sweet Potato Casserole and Brussels Sprouts

So one of the traditions that my friends and I have been doing recently has been a Friend Thanksgiving, which we usually hold sometime around actual Thanksgiving.  When it first started I tried to get it so that everyone could bring something that they felt was special to their family Thanksgivings.  But this didn't always work out, especially since I just wanted to bring Jello, which caused some gaps where people had to make the other foods.... like the Turkey, which was always handled superbly by Katie.

This year I just let everyone make their choices and then I filled in the gaps.  In this case that meant that I would be making a sweet potato dish and also a green dish, which ended up being a brussels sprout dish.

In all of the excitement of the friend Thanksgiving dinner, I managed to not take any pictures of the final results, which is kind of sad.  I also made the brussels sprouts for actual Thanksgiving, but again failed to take pictures, so I will just use pictures from the sites that I got the recipes from. 

Here is a picture of the brussels sprouts, taken from: http://www.eatliverun.com/


And here is a picture of the sweet potato casserole, taken from http://www.melskitchencafe.com/


The recipe that I used for the sweet potato casserole is (Link) :

Ingredients

  • 4 tablespoons light or dark brown sugar
  •  1 teaspoon freshly grated orange zest plus 2 tablespoons orange juice (from 1 orange)
  •  3 pounds sweet potatoes, peeled and cut into 1 1/2-inch pieces
  •  4 tablespoons butter, cubed
  •  1/4 cup heavy cream
  •  1 teaspoon salt
  •  1/2 teaspoon ground cinnamon
  •  1/4 teaspoon black pepper
  •  1/8 teaspoon cayenne pepper

Directions

Adjust an oven rack to the middle position in the oven and preheat the oven to 400 degrees. F. Mix 3 tablespoons of the brown sugar and 1/2 teaspoon of the orange zest together in a small bowl until thoroughly combined (reserve the other 1/2 teaspoon orange zest for later). Set aside.

Lay out 4 pieces of aluminum foil, each about 18 inches in length. Take two of the sheets and lay them perpendicular to each other (so it forms a thick cross) and do the same with the other two sheets of foil. Divide the sweet potatoes in half and put one half on one set of foil and the remaining potatoes on the other set of foil. Sprinkle the remaining tablespoon sugar over all the potatoes in both packets. Fold the opposite edges of the foil toward each other and crimp the edges to seal tightly. Place the packets inside a rimmed baking sheet and bake until the potatoes are tender, 45 to 60 minutes. Remove the baking sheet from the oven and preheat the broiler.

Carefully open one end from each pouch, careful to avoid escaping steam, and pour the potatoes and any remaining liquid into a blender or food processor. Add the butter, cream, orange juice, salt, cinnamon and remaining 1/2 teaspoon orange zest, pepper and cayenne. Process until the mixture is completely smooth. Transfer the potatoes to a 2- or 3-quart baking dish (that is broiler safe) and sprinkle evenly with the reserved brown sugar/zest mixture. Broil the sweet potatoes until the topping is lightly browned and bubbly, 2 to 4 minute. Serve warm.

And here is the recipe that I used for the brussels sprouts: (Link it is at the bottom of the page)

Ingredients

  • 12-14 large brussels sprouts
  • 1 tbsp olive oil
  • 1 clove garlic, minced
  • pinch sea salt
  • 2 tbsp brown sugar
  • 1/4 cup roughly chopped pecans or walnuts, toasted

Directions

Slice each brussels sprout very thin until you have a mound of feathery brussels sprout ribbons. Heat the olive oil over medium high in a large skillet and saute the garlic for 30 seconds. Add the brussels sprouts and continue sauteing for another 4-5 minutes, until bright green and tender. Add the sea salt and brown sugar and toss together. Finish by adding the toasted nuts.

The Process

 So I first worked on the sweet potato dish and then once that was in the oven I worked on the brussels sprouts.

Here the sweet potatoes are getting wrapped in foil in preparation for the oven.
 Here and the individual little packets.  I probably used a little bit more sugar than the recipe recommended when I sprinkled it over the potatoes.  There just didn't seem to be enough with the small amount they said to use.
 I then placed both packets on a cookie sheet and put it in the oven.

Sprinkles was pretty unimpressed with my cooking and spent the whole time sleeping on the couch.
 Soon the sweet potatoes were done and I removed them from the oven.
 I then placed them in the blender along with the butter and sugar and other stuff.... and mixed it up!

 Here is the end result!

This recipe managed to destroy my blender as it no longer worked after this.  But it managed to finish this recipe, so that was good.  I poured it out into a casserole dish and added the topping.  Then broiled it for a few minutes and it was ready.  When I took it to dinner I heated it up slightly in the oven just so that it was warm.

The brussels sprouts was a much less involved dish, the only real difficulty was in chopping up the brussels sprouts.  I had to thinly slice them which was a little taxing, and I am not sure that I got it totally right.  I ended up removing most of the end pieces on the dish since they didn't really seem to fit.

Once they were all sliced up I cooked them up over the stove for a few minutes, then I added the toasted nuts and stirred it up.

I thought that both of these dishes turned out really well.  I probably liked the brussels sprouts a bit better and I know that my parents loved it at actual Thanksgiving.  It was fun making something that I don't always make for thanksgiving, and I think that I also managed to destroy my first cooking equipment, which is always fun.  Of course, I think this is the first time I've used the blender in several years....so I am sure that I will soon find a recipe that I want to make that calls for a blender.

Wednesday, January 2, 2013

Recipe 35: Beef Tenderloin with Mushroom Dill Sauce

 So one of the things that I have been very hesitant to cook has been steak.  I always have felt like steak was something where timing was important and you had to get it just right or it could mess it up.  And I never like messing up food, so I delayed trying it as long as possible.

At this point in the year (early November when I made this) I figured that I was proficient in cooking that I could at least attempt it.  Of course, then I got talked into trying a rather fancier recipe than I was expecting.  So I was a little nervous in attempting this one.  There are also no pictures of me actually making the steak... which is kind of a shame.  But I totally forgot it.

In addition to the steak I made some roasted fingerling potatoes, which I thought was a nice combination.  This isn't a perfect picture, but here is the final result of the steak.


And here is the recipe that I used for the steak(Link).  In addition I used this recipe (link) for the fingerling potatoes.  They were pretty simple, so I won't focus on them.

Ingredients

  • 3 Tbs. unsalted butter   
  • 12 oz. assorted fresh mushrooms, cleaned, trimmed, and sliced 1/4 inch thick  
  • Kosher salt  
  • 1/2 cup minced shallot (about 1 large)  
  • 2 Tbs. Cognac  
  • 3/4 cup lower-salt beef broth  
  • 1 Tbs. vegetable oil  
  • 4 6-oz. beef tenderloin steaks (about 1 inch thick), preferably at room temperature  
  • Freshly ground black pepper  
  • 3 Tbs. sour cream  
  • 1 tsp. Dijon mustard  
  • 1/2 Tbs. minced fresh dill

Directions

Melt the butter in a 12-inch heavy-duty skillet over medium-high heat. Add the mushrooms, season generously with salt, and cook, stirring occasionally, until golden, about 8 minutes. Reduce the heat to medium, add the shallot, and cook until softened, about 3 minutes more. Remove the skillet from the heat and carefully add the Cognac, stirring to deglaze the pan. Add the broth, bring to a boil over medium heat, reduce the heat to low, and simmer for 3 minutes. Cover the skillet, and set aside.

Meanwhile, heat the oil in a 12-inch cast-iron skillet over medium-high heat. Pat the steaks dry and season generously on both sides with salt and pepper. When the pan is very hot, add the steaks. Sear until a dark crust forms, 4 to 5 minutes. Turn the steaks, and cook to desired doneness, about 5 minutes more for medium rare. Remove the skillet from the heat, transfer the steaks to a platter, tent with foil, and let rest for 5 minutes.

With a rubber spatula, scrape the mushroom mixture into the cast-iron skillet. Add the sour cream and mustard, stirring until heated through and well mixed. If necessary, return the skillet to the stove top to heat the sauce. Stir in the dill.

Transfer the steaks to plates, spoon the sauce over, and serve.

Changes

I think that the only change that I made in this recipe was that I didn't have cognac.  I didn't actually have any available.  I believe that I used some brandy as a replacement, but you can also use scotch or whiskey if desired. This link is helpful when trying to determine what can replace certain alcohols.

The Process

 Luckily, I was at Katie and Will's and so Katie was available to help with this.  A lot of my timing stuff probably would have been uglier had she not been there.  She helped a lot with the mushroom sauce, while I dealt with the steaks.

Here is the mushrooms after the sour cream was added.

 Here is is after it has been mixed together and heated up.
 And here are the fingerling potatoes.

Since I managed to forget taking pictures of the steak I will just discuss it.  For this recipe you really want to make the pan as hot as possible since you are going to be searing the steak.  So you heat the pan up really hot and then place the steaks on it.  If you have a splatter guard it would be good to put that over the skillet.  You then cook it for maybe 4 minutes, it depends on how hot the pan is I guess.  Then you flip them over and cook them for maybe 4 more minutes.  You really don't want to cook it much more than that, and you want to be pretty careful about not overcooking it.

And here again is the final result.

I thought that this steak was absolutely terrific.  It was really really great.  The steak was just about perfectly cooked and the mushroom sauce was terrific.  I thought the potatoes were fine, but they certainly didn't compare to the steak.  I would highly recommend this recipe to anyone who wants to make steak.

Thursday, December 27, 2012

Recipe 34: Chicken Breasts Pierre

So after dabbling in fancy dishes with Salmon and Quinoa, I decided to once again go back the the old staple chicken.  I think that this is just about my last chicken dish that I made.... which seems unlikely given that I have made a lot.  I never knew there were so many ways to make chicken, before I attempted this new recipe every week thing.  In general, having a new way to make chicken was kind of a life saver since it was always easy and I could usually whip through it on days when I didn't want to attempt something massive.

For this dish I found something that sounded kind of exotic, but it also had really good reviews, so I figured I would try it.  Here is a picture of the final result.  The recipe doesn't call for it, but I served it on top of a bed of white rice since many reviewers recommended that.  I almost think that the tomato sauce mixed with the rice was my favorite part of this dish.


And here is the recipe that I used: (Link)

Ingredients

  •      6 skinless, boneless chicken breast halves
  •     1/4 cup all-purpose flour
  •     1/2 teaspoon salt
  •     1 pinch ground black pepper
  •     3 tablespoons butter
  •     1 (14.5 ounce) can stewed tomatoes, with liquid
  •     1/2 cup water
  •     2 tablespoons brown sugar
  •     2 tablespoons distilled white vinegar
  •     2 tablespoons Worcestershire sauce
  •     1 teaspoon salt
  •     2 teaspoons chili powder
  •     1 teaspoon mustard powder
  •     1/2 teaspoon celery seed
  •     1 clove garlic, minced
  •     1/8 teaspoon hot pepper sauce

Directions

  1. In a shallow dish or bowl, combine flour, 1/2 teaspoon salt and ground black pepper. Coat chicken breasts with flour mixture. Melt butter in a large skillet over medium heat, and brown chicken on all sides. Remove from skillet, and drain on paper towels.
  2. In the same skillet, combine the tomatoes, water, brown sugar, vinegar and Worcestershire sauce. Season with salt, chili powder, mustard, celery seed, garlic and hot pepper sauce. Bring to a boil; reduce heat, and return chicken to skillet. Cover, and simmer for 35 to 40 minutes, or until chicken is tender, no longer pink and juices run clear.

Changes

I made a few minor changes to this.  The first was just in how much I made, I only made four breasts.  The second is how I applied the flour mixture.  Sometime during this year I found that the best way to apply a flour or any coating to meat, especially to chicken, is to mix everything together in a ziploc bag and then drop the breast in and move it around inside the bag.  This is terrific and really easy. (Note: It feels odd to actually have a cooking tip to give out, even if it might be well known)

The final change was that I cooked up some white rice to serve with this.  I thought the rice complimented this dish really well and I would definitely recommend making it if you make this recipe.

The Process

So after coating the chicken in flour, I started to cook them in the skillet.  Since it is going to cook more with the sauce you don't want to cook them all the way through, simply brown it on all sides.


 This was hard for me to accept, but I figured the recipe knew best.  Here is the chicken after finishing on the skillet.

 I next started the sauce, shown below.

Once it was ready I added the chicken to the mixture.

I let it simmer and then moved on to the rice.  Sprinkles observed me from her perch at the top of the cabinets.

Soon the dish was ready, and the final result is below.

I really liked this dish.  It was pretty simple, but also very good.  The sauce on the rice was terrific and the chicken was good too.

Since I know what comes next, I will preview the future.  Things are about to get slightly higher scale.  Up to this point I had mostly been making things from allrecipes.com, which was good because for the most part the recipes are straightforward and easy enough for me to make.  But starting with the next recipe, I got the majority of my recipes from finecooking.com, which is sort of a step up from me.  It will be interesting to see how I fare...