Sunday, August 12, 2012

Recipe 18: Shrimp and Quinoa

The back log continues, this time it is time to discuss the Shrimp and Quinoa dish that I made.  Again, I am pretty sure that this dish is from sometime in May, so obviously I am struggling to actually fight back against the backlog.

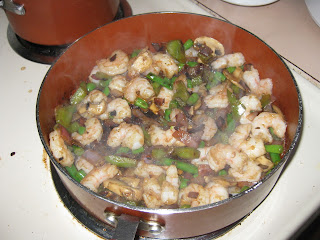
Here is the final result:

And here is the recipe that I used for this:

Ingredients

  • 1 1/2 cups water
  • 1 cup uncooked quinoa
  • 2 tablespoons olive oil
  • 1 red onion, chopped
  • 1/2 green bell pepper, chopped
  • 1/2 cup sliced fresh mushrooms
  • 6 fresh asparagus spears, trimmed and chopped
  • 1/4 cup golden raisins
  • 1 tablespoon minced fresh ginger root
  • salt and pepper to taste
  • 1 pound medium shrimp - peeled and deveined
  • 1 lime, juiced
  • 2 tablespoons olive oil
  • 1/2 cup chopped Italian flat leaf parsley

Directions

  1. In a large pot, bring the water to a boil, and stir in the quinoa. Cover, reduce heat to low, and simmer 15 minutes. Remove from heat, and set aside 10 minutes, or until all liquid has been absorbed.
  2. Heat 2 tablespoons olive oil in a skillet over medium heat, and saute the onion and green bell pepper until tender. Mix in the mushrooms, asparagus, raisins, and ginger, and continue cooking until asparagus is tender. Season with salt and pepper. Mix in the shrimp, and cook 5 minutes, or until opaque.
  3. In a large bowl, mix the quinoa with the lime juice and remaining 2 tablespoons olive oil. Toss with the skillet mixture and parsley to serve.

Changes

I made a few changes to this, instead of adding asparagus and raisins I added some green beans and the full green pepper.

I also want to discuss Quinoa a little bit.  It is very important to either
1) Buy prewashed Quinoa
or
2) Make sure to wash it very carefully.  If you don't wash it you can get kind of a rubbery taste to the Quinoa.


The Process

I started cooking the Quinoa.  Instead of water you can use chicken broth, which I think is a good addition.  I can't remember exactly what I did for this recipe, but I think I just used water.

At the same time I began cooking the veggies in the skillet.

Sprinkles was far more interested in looking out the window that watching me cook.  I don't think that she likes Quinoa much.

I added the mushrooms and continued cooking the veggies.

I soon added the shrimp.

and cooked it until the shrimp was done.

Once everything was cooked I mixed it all together in a bowl and served it up.


I really liked this dish, it was really tasted and pretty healthy and a nice way to get Quinoa in my diet.  I would certainly recommend trying this and next time I might actually h

Recipe 19: Manicotti

 I finally made it through all of the recipes that I made in Oregon and am now onto the first recipe that I made in Texas.  I asked one of my roommates what he wanted and he requested Manicotti, so that is what I made.

Here is a picture of the completed recipe:

And here is the recipe that I used.

Ingredients

  • 1 pint part-skim ricotta cheese
  • 8 ounces shredded mozzarella cheese
  • 3/4 cup grated Parmesan cheese
  • 2 eggs
  • 1 teaspoon dried parsley
  • salt to taste
  • ground black pepper to taste
  • 1 (16 ounce) jar spaghetti sauce
  • 5 1/2 ounces manicotti pasta

Directions

  1. Cook manicotti in boiling water until done. Drain, and rinse with cold water.
  2. Preheat oven to 350 degrees F (175 degrees C).
  3. In a large bowl, combine ricotta, mozzarella, and 1/2 cup Parmesan, eggs, parsley, and salt and pepper. Mix well.
  4. Pour 1/2 cup sauce into an 11x17 inch baking dish. Fill each manicotti shell with 3 tablespoons cheese mixture, and arrange over sauce . Pour remaining sauce over top, and sprinkle with remaining Parmesan cheese.
  5. Bake 45 minutes, or until bubbly.

Changes

I didn't make any changes to this recipe.  It was pretty straightforward.  The only thing that is worth talking about is how I filled the manicotti.  This was very similar to the stuffed shells that I made previously.  To fill the manicotti I filled a plastic bag with the filling and the cut a small hole in one corner, which allowed me to squeeze the filling.


The Process

I first mixed the filling together, which is shown below.  While I was doing this I also boiled the manicotti to cook it up.


Here is the plastic bag with the filling and a hole cut in the corner.


Here is the manicotti filled on top of the sauce.

And then finally here is the manicotti in the oven and ready to cook.


This was a really simple recipe to make and was pretty good, and it seemed like my roommate kind of liked it.